MyEclipse JSP connects to MySQL Database
Contents
STEPS
0) Preparation
0.1) Download Server Package.
0.2) Run Apache and MySQL Server.
0.3) Setup MySQL Database.
0.4) Download MySQL Database Connector for Java.
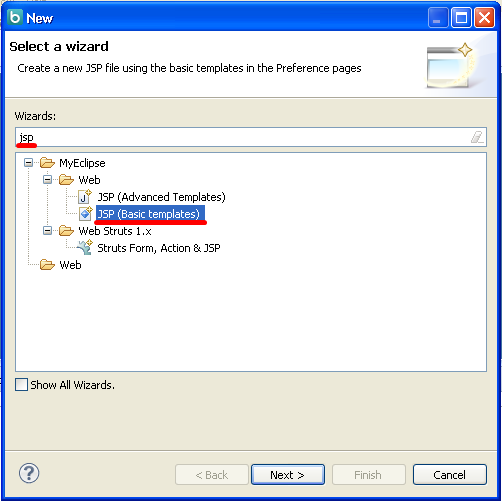
1) Create JSP File.
1.1) Type the name “query.jsp”.
1.2) Edit the HTML Title as “Book Query”.
1.3) Insert the following codes to the HTML Body:
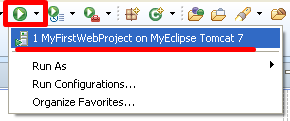
2) Run.
2.1) Observe Outcome.
2.2) Troubleshooting error.
DOWNLOAD
STEPS
0) Preparation
0.1) Download Server Package.
Use a simple portable Windows-Apache-MySQL-PHP (WAMP) package such as XAMPP or USBWEBSERVER.
Unzip the package near to the root, eg c:\apps\usbw86\
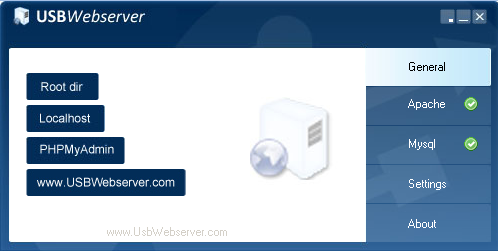
0.2) Run Apache and MySQL Server.
Double-Click the Server Icon to run usbwebserver.
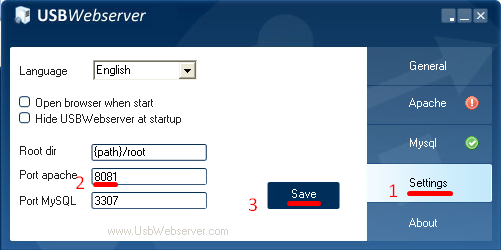
If your Apache server doesn’t run, it could be that it is having a port conflict issue.
Go to the Settings tab, change the number 8080 to other number eg 8081, click Save and wait for the Apache server to restart.
0.3) Setup MySQL Database.
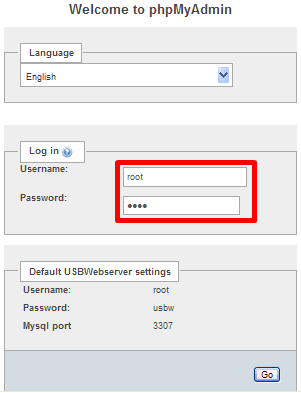
Click PHPMyAdmin button. Your Web Browser will open the PHPMyAdmin page.
Log into PHPMyAdmin page.
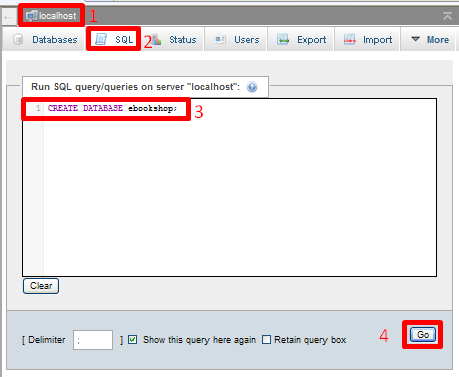
Create a new Database; 1) Click localhost link, 2) Click SQL tab, 3) Type “CREATE DATABASE ebookshop;” in the text box, 4) Click GO button.
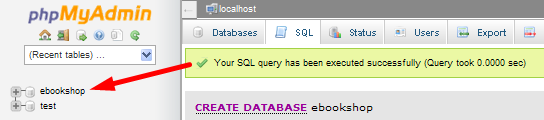
You should get Success message.
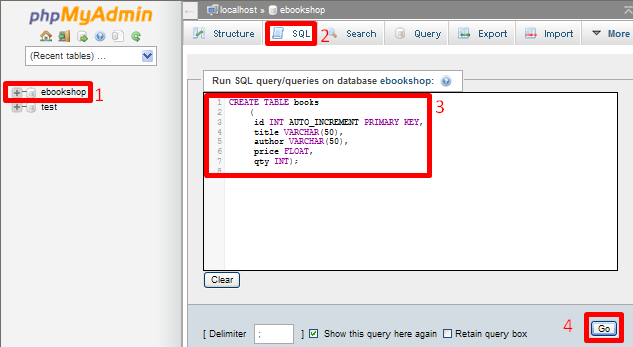
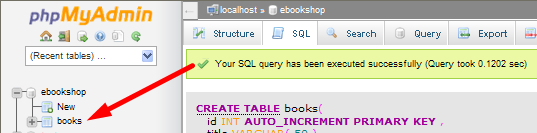
Insert records to the database; 1) Click the database name, ebookshop, 2) Click SQL Tab, 3) Type SQL Commands below, 4) Click GO Button.
CREATE TABLE books
(
id INT AUTO_INCREMENT PRIMARY KEY,
title VARCHAR(50),
author VARCHAR(50),
price FLOAT,
qty INT)
);
|
Table created.
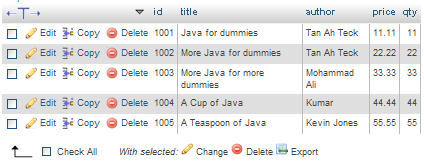
Insert Records.
INSERT INTO books
(id,title,author,price,qty)
VALUES
(1001,'Java for dummies','Tan Ah Teck',11.11,11);
|
INSERT INTO books
(id,title,author,price,qty)
VALUES
(1002,'More Java for dummies','Tan Ah Teck',22.22,22);
|
INSERT INTO books
(id,title,author,price,qty)
VALUES
(1003,'More Java for more dummies','Mohammad Ali',33.33,33);
|
INSERT INTO books
(id,title,author,price,qty)
VALUES
(1004,'A Cup of Java','Kumar',44.44,44);
|
INSERT INTO books
(id,title,author,price,qty)
VALUES
(1005,'A Teaspoon of Java','Kevin Jones',55.55,55);
|
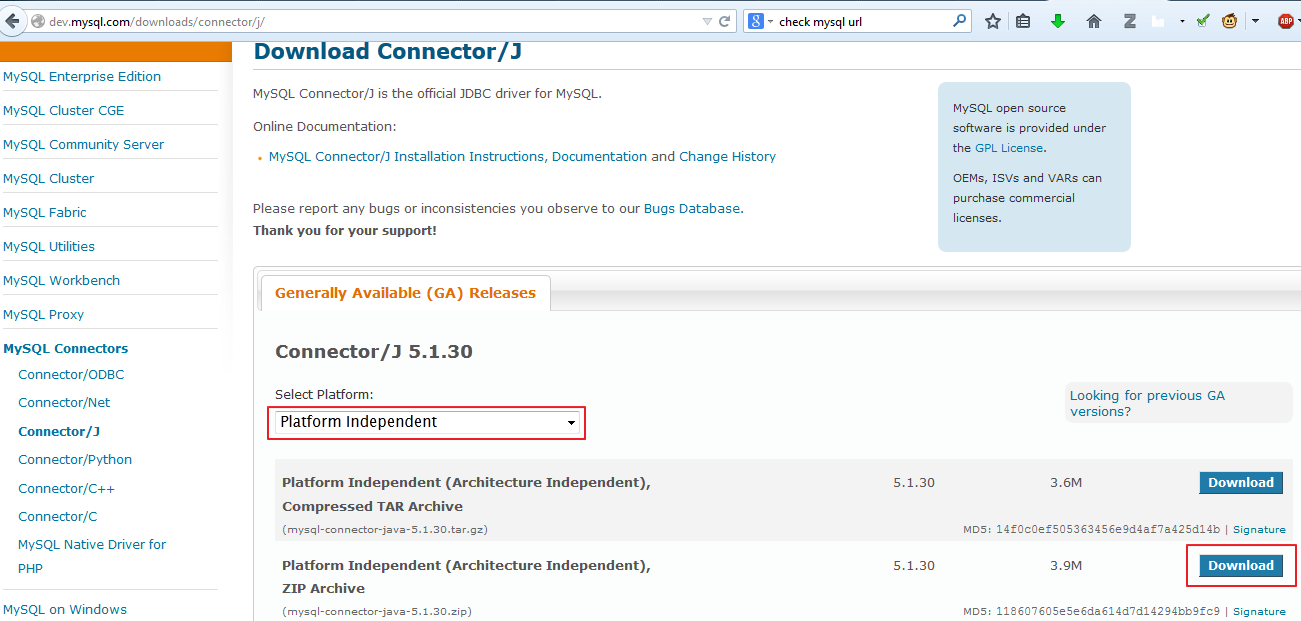
0.4) Download MySQL Database Connector for Java.
Download zip file to c:\apps\ and unzip it.
JAR file should be found in C:\Apps\mysql-connector-java-5.1.31\mysql-connector-java-5.1.31 .
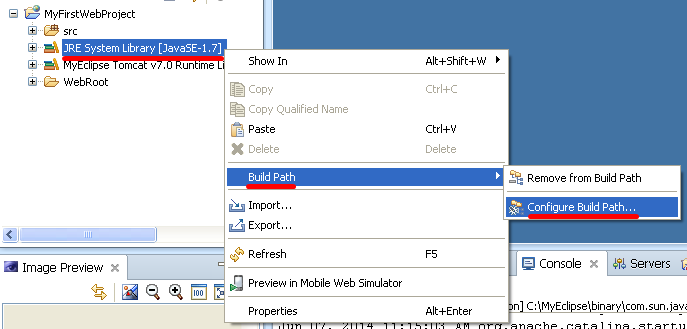
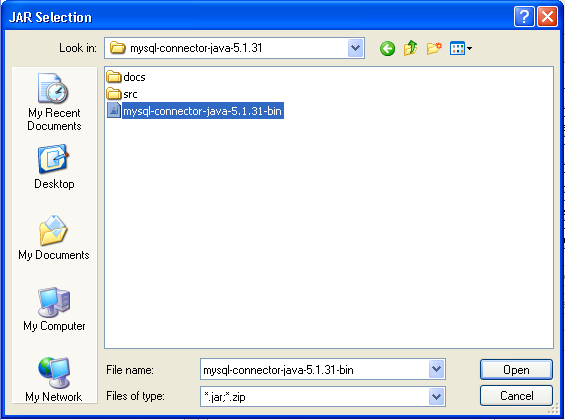
Configure Build Path…
Select External JARs.
Select the JAR file.
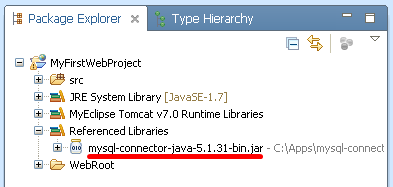
JAR file is added to library (refer the first item in the list, mysql-connector-java-5.1.31-bin.jar ). Click OK.
The file is included in the Referenced Libraries group in the project.
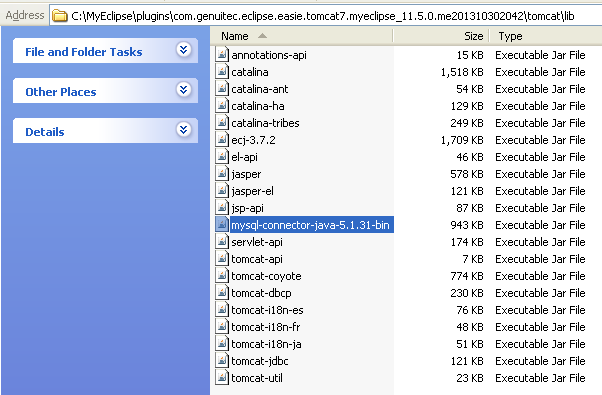
Place the JAR file inside Tomcat Library folder as well.
This tutorial is using MyEclipse Tomcat7. It is located at “com.genuitec.eclipse.easie.tomcat7.myeclipse_11.5.0.me201310302042”
Put the JAR file into “tomcat\lib” under the above folder path.
1) Create JSP File.
1.1) Type the name “query.jsp”.
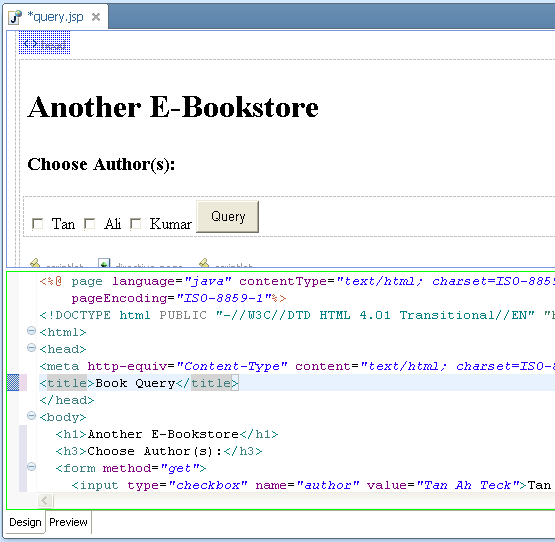
1.2) Edit the HTML Title as “Book Query”.
1.3) Insert the following codes to the HTML Body:
<h1>Another E-Bookstore</h1>
<h3>Choose Author(s):</h3>
<form method="get">
<input type="checkbox" name="author" value="Tan Ah Teck">Tan
<input type="checkbox" name="author" value="Mohd Ali">Ali
<input type="checkbox" name="author" value="Kumar">Kumar
<input type="submit" value="Query">
</form>
<%
String[] authors = request.getParameterValues("author");
if (authors != null) {
%>
<%@ page import = "java.sql.*" %>
<%
//Accessing driver from JAR File
Class.forName("com.mysql.jdbc.Driver");
Connection conn = DriverManager.getConnection(
"jdbc:mysql://localhost:3307/ebookshop", "root", "usbw"); // <== Check!
// Connection conn =
// DriverManager.getConnection("jdbc:odbc:eshopODBC"); // Access
Statement stmt = conn.createStatement();
String sqlStr = "SELECT * FROM books WHERE author IN (";
sqlStr += "'" + authors[0] + "'"; // First author
for (int i = 1; i < authors.length; ++i) {
sqlStr += ", '" + authors[i] + "'"; // Subsequent authors need a leading commas
}
sqlStr += ") AND qty > 0 ORDER BY author ASC, title ASC";
// for debugging
System.out.println("Query statement is " + sqlStr);
ResultSet rset = stmt.executeQuery(sqlStr);
%>
<hr>
<form method="get" action="order.jsp">
<table border=1 cellpadding=5>
<tr>
<th>Order</th>
<th>Author</th>
<th>Title</th>
<th>Price</th>
<th>Qty</th>
</tr>
<%
while (rset.next()) {
int id = rset.getInt("id");
%>
<tr>
<td><input type="checkbox" name="id" value="<%= id %>"></td>
<td><%= rset.getString("author") %></td>
<td><%= rset.getString("title") %></td>
<td>$<%= rset.getInt("price") %></td>
<td><%= rset.getInt("qty") %></td>
</tr>
<%
}
%>
</table>
<br>
<input type="submit" value="Order">
<input type="reset" value="Clear">
</form>
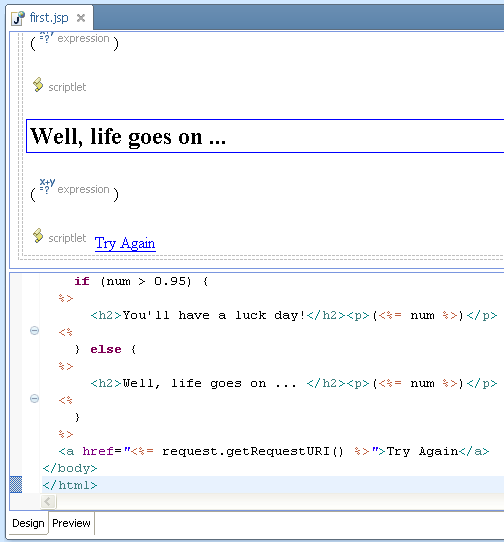
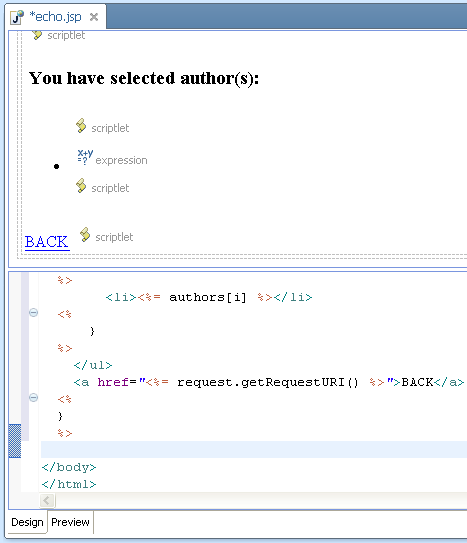
<a href="<%= request.getRequestURI() %>"><h3>Back</h3></a>
<%
rset.close();
stmt.close();
conn.close();
}
%>
|
2) Run.
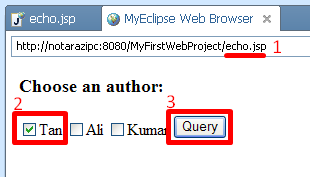
2.1) Observe Outcome.
After you click the Query button, you should get the following:
2.2) Troubleshooting error.
You may get error such as “java.lang.ClassNotFoundException: com.mysql.jdbc.Driver”.
It means that your JAR file could not be found. Check that you have copied the file to the correct location.
DOWNLOAD