MyEclipse - Create New Dynamic Web Project
STEPS
1) Run MyEclipse.
2) Create New Project.
Go to Menu File/New/Other…
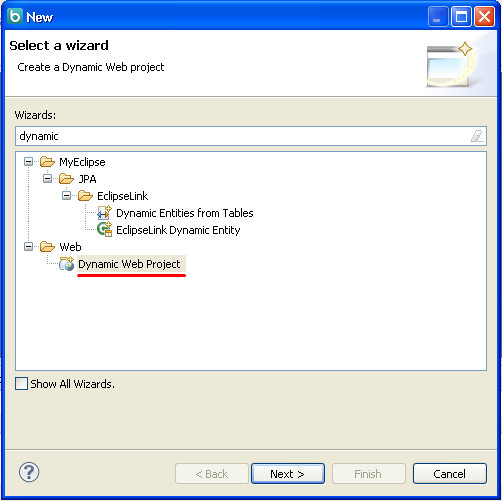
3) Find a wizard for Dynamic Web Project.
4) Set Project Name, Target Runtime and Web module version.
5) Accept Default project build.
6) Configure Web Module settings.
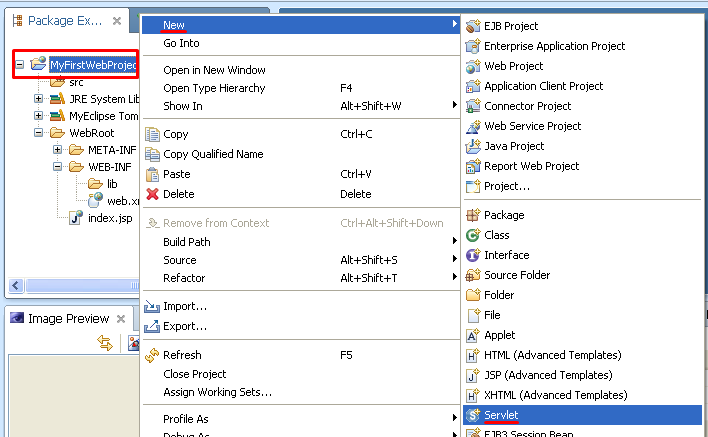
7) Project files and folder structure is created.
8) Create new Servlet for the project.
9) Type the Package Name and Class Name.
10) Take note of the Servlet/JSP Mapping URL. You will need it later.
11) Servlet (java class) is created.
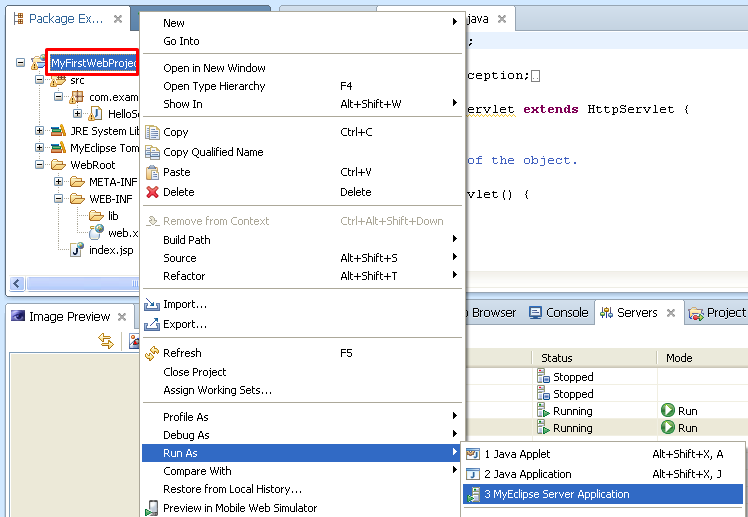
12) Run the project.
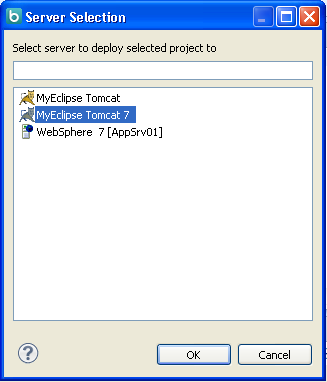
13) Select target Server.
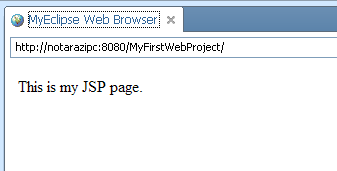
14) Welcome page is displayed in Web Browser.
15) Append the URL with the Mapping URL in shown in Step 10.
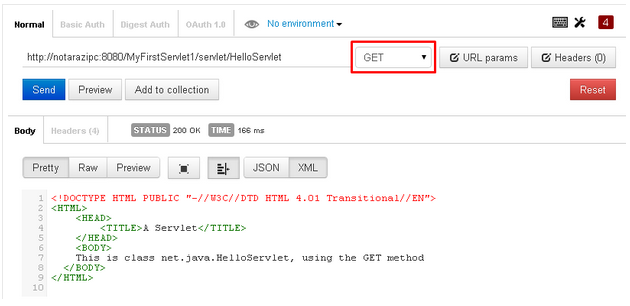
16) You can use POSTMAN REST CLIENT in Google Chrome to check the validity of the links.
1) Run MyEclipse.
2) Create New Project.
Go to Menu File/New/Other…

3) Find a wizard for Dynamic Web Project.
Type the word “dynamic”.
You should find “Dynamic Web Project”.
Click Next.
4) Set Project Name, Target Runtime and Web module version.
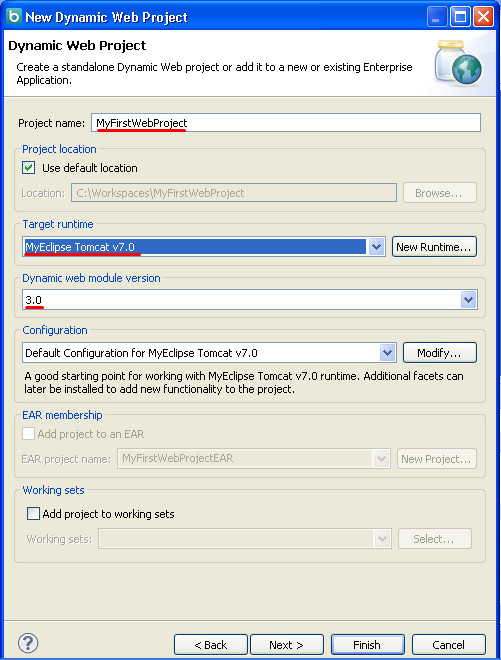
5) Accept Default project build.

6) Configure Web Module settings.
- Select Generate index.jsp welcome file.
- Generate web.xml deployment descriptor.
Click Finish.

7) Project files and folder structure is created.

8) Create new Servlet for the project.
Right-click the project name, select New/Servlet.
9) Type the Package Name and Class Name.
Click Next.


No comments:
Post a Comment