Java EE 108 Create Maven Project
This tutorial is based on http://www.youtube.com/watch?v=1cHIZTmN0z8
This exercise requires Internet Connection
1) Run Eclipse.
2) Create New Maven Project.
3) New Maven Project Wizard.
4) Add Spring Nature.
5) Delete Test Source Folders.
6) Change JRE Library.
7) Check POM.xml file content.
8) Start with Maven Clean.
9) Maven Install.
10) Dealing with Error Message.
11) Create startup XML and JSP files.
12) Maven Build.
13) Deploy War into Tomcat server.
STEPS
1) Run Eclipse.
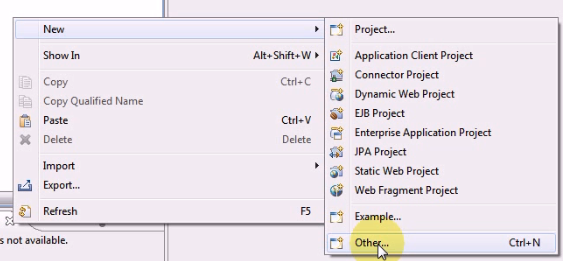
2) Create New Maven Project.
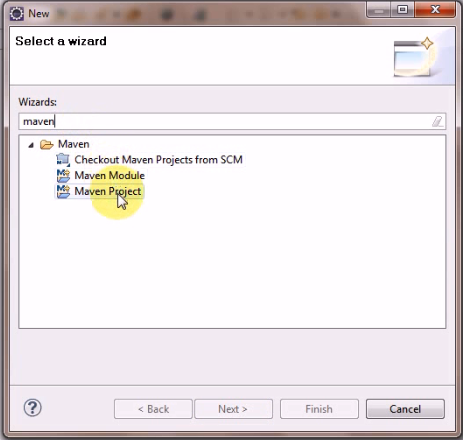
Choose Other…
Type Maven.
Select Maven Project.
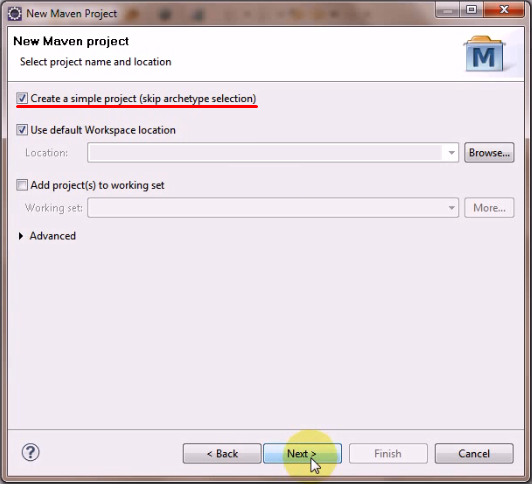
3) New Maven Project Wizard.
3.1) Create a simple project (skip archetype selection).
3.2) Fill-in project configuration details.

3.3) Project is created.
4) Add Spring Nature.
4.1) Right-click project name, select Spring Tools/Add Spring Project Nature.

4.2) Spring Element is added to project.

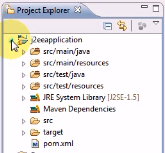
5) Delete Test Source Folders.
5.1) The class folder.
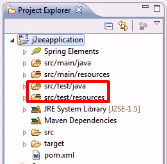
5.2) The resource folder.

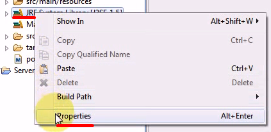
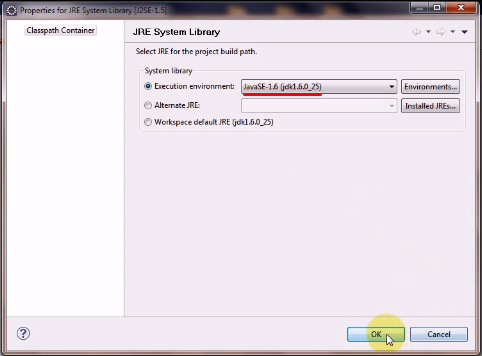
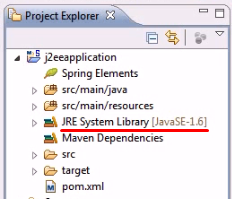
6) Change JRE Library.
6.1) Right-click the Library item, select properties.
6.2) Change to JavaSE-1-6 (jdk 1.6.0_25)
6.3) Outcome:
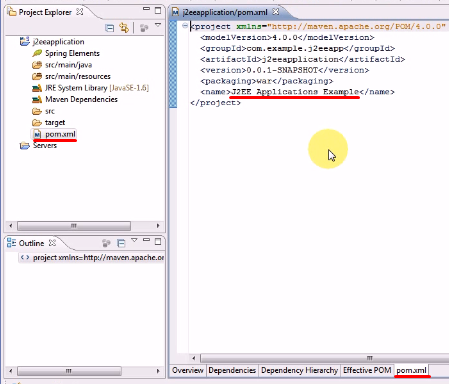
7) Check POM.xml file content.
Ensure the right project name.
8) Start with Maven Clean.
8.1) Right-click project name, select Run As/Maven clean.

8.2) Outcome:

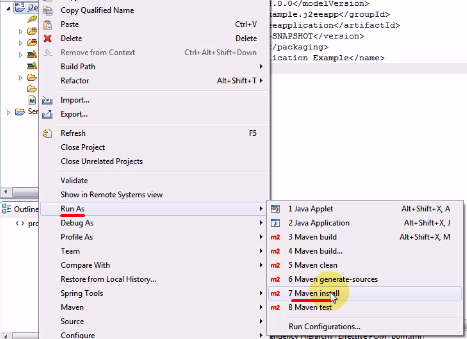
9) Maven Install.
9.1) Right-click project name, select Run As/Maven install.
10) Dealing with Error Message.
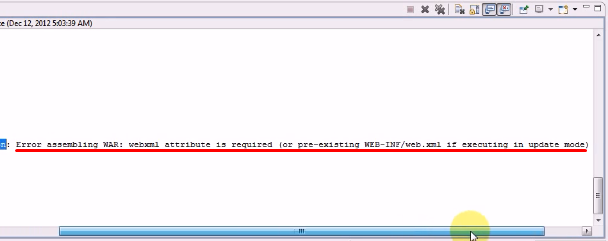
10.1) You may get error message “Failed to execute goal …”
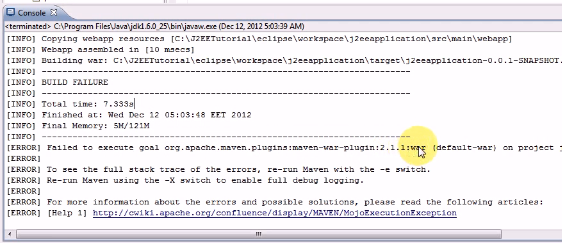
10.2) This is because the xml file is missing.
11) Create startup XML and JSP files.
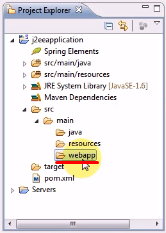
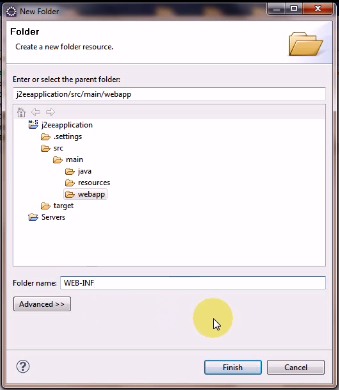
11.1) Files must be created under webapp folder.
11.2) Right-click webapp folder, select New/Folder.

11.3) Type “WEB-INF” name.
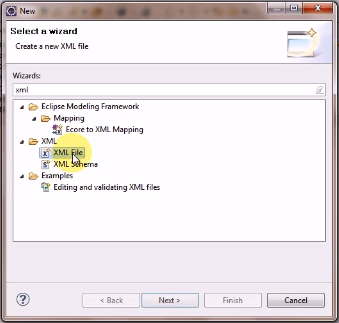
11.4) In WEB-INF folder, select New/Other…

11.5) Select XML file.
11.6) Type web.xml

11.7) Select XML Template.

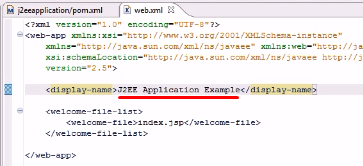
11.8) Edit the file as follows:
<?xml version="1.0" encoding="UTF-8"?>
<web-app xmlns:xsi="http://www.w3.org/2001/XMLSchema-instance"
xmlns="http://java.sun.com/xml/ns/javaee" xmlns:web="http://java.sun.com/xml/ns/javaee/web-app_2_5.xsd"
xsi:schemaLocation="http://java.sun.com/xml/ns/javaee http://java.sun.com/xml/ns/javaee/web-app_2_5.xsd" version="2.5">
<display-name>J2EE Applications Example</display-name>
<welcome-file-list>
<welcome-file>index.jsp</welcome-file>
</welcome-file-list>
</web-app>
|
11.9) Right-click webapp folder, select New/Other.
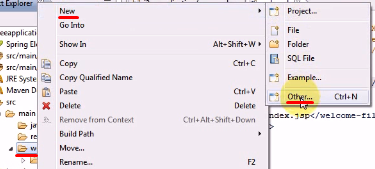
11.10) Choose JSP File.

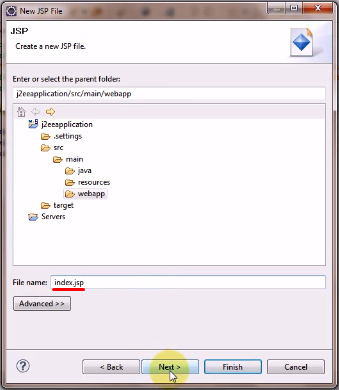
11.11) Type index.jsp
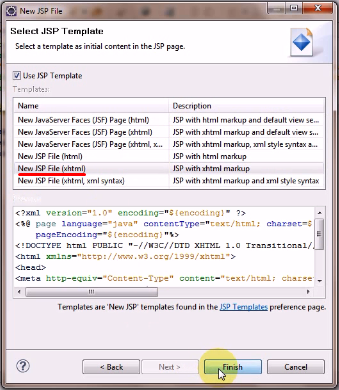
11.12) Choose New JSP(XHTML) Template
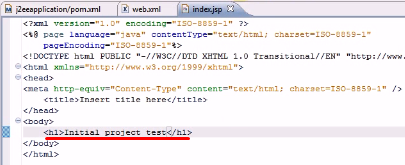
11.13) Type some html tags for testing.
12) Maven Build.
12.1) Right-click project name, select Run As/Maven Build…

12.2) In Edit Configuration window, type “Clean Install” in the Goals field.

12.3) You should finally get BUILD SUCCESS message.

12.4) Take note of war folder, eg:
C:\Documents and Settings\Administrator\.m2\repository\com\example\j2eeapp\j2eeapplication\0.0.1-SNAPSHOT
|

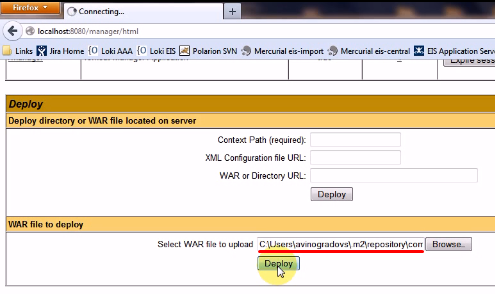
13) Deploy War into Tomcat server.
13.1) Log into Tomcat App Manager, eg http://localhost:8080/manager/
13.2) Scroll down to find deploy section.
13.3) Browse for the war file and click Deploy.
13.4) The application should appear in the Application list.
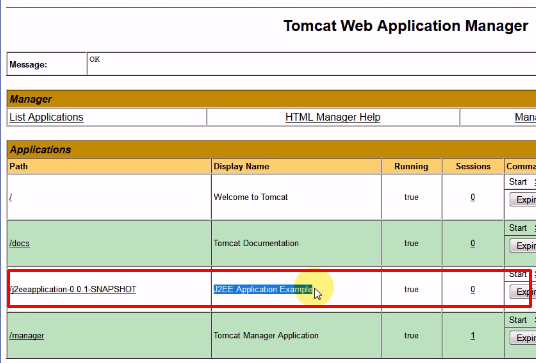
13.5) If you click the path above, you should get the following output:

No comments:
Post a Comment