NetBeans 8: Build, Run and Distribute Java Application
Once you are satisfied that your application works properly, you can prepare the application for deployment outside of the IDE. In this section you will build the application's JAR file and then run the JAR file from the command line.
STEPS
1) START NETBEANS
2) Building the Application
The main build command in the IDE is the Clean and Build command. The Clean and Build command deletes previously compiled classes and other build artifacts and then rebuilds the entire project from scratch.
Notes: There is also a Build command, which does not delete old build artifacts, but this command is disabled by default. See About Building Java Projects in Developing Applications with NetBeans IDE for more information.
|
To build the application:
2-1) Choose Run > Clean and Build Project (Shift-F11).

2-2) Output from the Ant build script appears in the Output window.
If the Output window does not appear, you can open it manually by choosing Window > Output > Output.

When you clean and build your project, the following things occur:
- Output folders that have been generated by previous build actions are deleted ("cleaned"). (In most cases, these are the build and dist folders.)
- build and dist folders are added to your project folder (hereafter referred to as the PROJECT_HOME folder). You can view these folders in the Files window.
- All of the sources are compiled into .class files, which are placed into the PROJECT_HOME/build folder.
- A JAR file containing your project is created inside the PROJECT_HOME/dist folder.
- If you have specified any libraries for the project (in addition to the JDK), a lib folder is created in the dist folder. The libraries are copied into dist/lib.
- The manifest file in the JAR is updated to include entries that designate the main class and any libraries that are on the project's classpath.


Note: You can view the contents of the manifest in the IDE's Files window. After you have built your project, switch to the Files window and navigate to dist/MyApp.jar.
|
2-3) Expand the node for the JAR file (MyApp.jar), expand the META-INF folder, and double-click MANIFEST.MF to display the manifest in the Source Editor.

Notice the following items:
Main-Class: acrostic.Main
Class-Path: lib/MyLib.jar
3) Running the Application outside of the IDE
To run the application outside of the IDE:
3-1) On your system, open up a command prompt or terminal window.
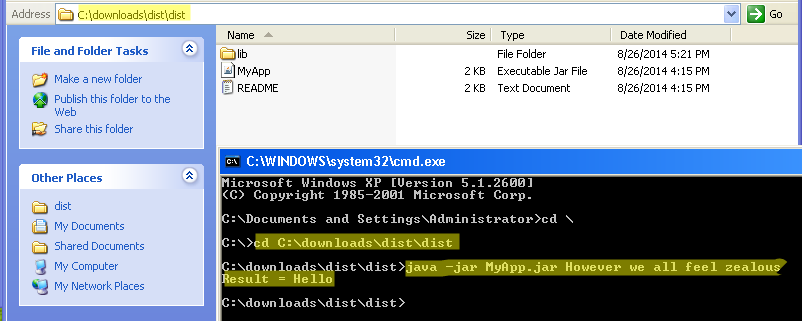
3-2) In the command prompt, change directories to the MyApp/dist directory.
3-3) At the command line, type the following statement:
java -jar MyApp.jar However we all feel zealous
|
3-4) The application then executes and returns the following output as shown in the image below:
Result = Hello
|
3-5) Command prompt showing the output from the running program.

4) Distributing the Application to Other Users
Now that you have verified that the application works outside of the IDE, you are ready to distribute the application.
To distribute the application:
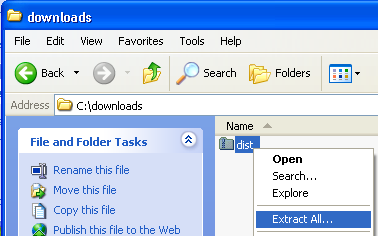
4-1) On your system, create a zip file that contains the application JAR file (MyApp.jar) and the accompanying lib folder that contains MyLib.jar.

4-2) Send the file to the people who will use the application. Instruct them to unpack the zip file, making sure that the MyApp.jar file and the lib folder are in the same folder.
4-3) Instruct the users to follow the steps in the Running the Application Outside of the IDE section above.
DOWNLOAD: Completed Project File
Source: https://netbeans.org/kb/docs/java/javase-intro.html
---
No comments:
Post a Comment