NetBeans 8 Test and Debug Java Applications
STEPS
1) Start NetBeans
Continue from the previous tutorial or download startup file.
2) Testing the Application
Now you will create and run a test for the project using JUnit and then run the application in the IDE's debugger to check for errors. In the JUnit test, you will test the LibClass by passing a phrase to the acrostic method and using an assertion to indicate what you think the result should be.
2-1) Creating JUnit Tests
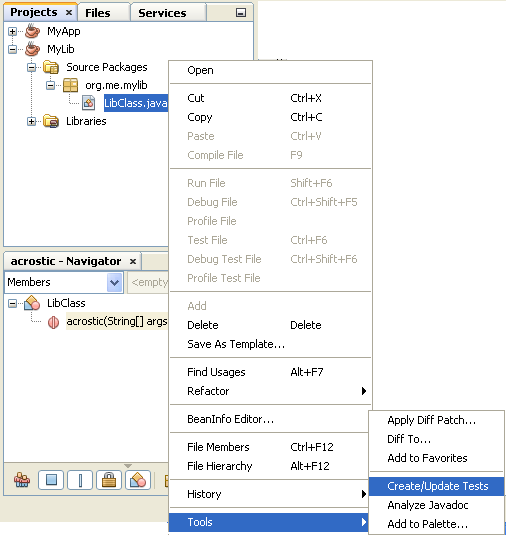
2-1-1) Right-click the LibClass.java node in the Projects window and choose Tools >Create/Update Tests (Ctrl-Shift-U).
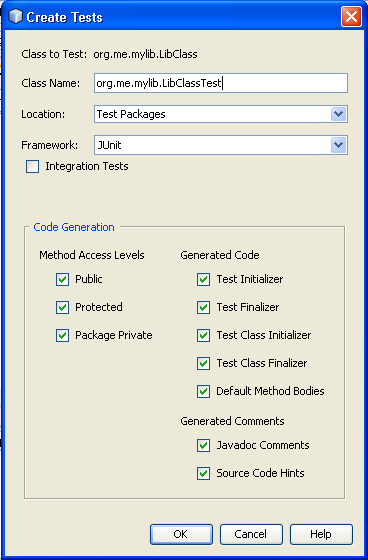
2-1-2) In the Create Tests dialog box, click OK to run the command with the default options.
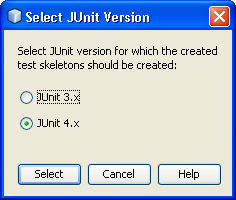
Note: If this is the first time you have created JUnit tests in the IDE, you will be prompted with the Select JUnit Version dialog box. Press Enter to select JUnit 4.x and continue to the Create Tests dialog box.
|
2-1-3) The IDE creates the org.me.mylib package and the LibClassTest.java file in a separate test folder. You can find this file by expanding the Test Packages node and the org.me.mylib subnode.

2-1-4) In LibClassTest.java, delete the body of the public void testAcrostic() method.
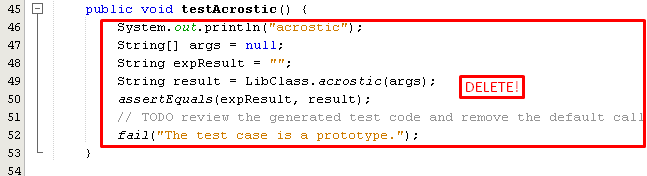
2-1-5) In place of the deleted lines, type or paste in the following:
System.err.println("Running testAcrostic...");
String result = LibClass.acrostic(new String[]
{"fnord", "polly", "tropism"});
assertEquals("Correct value", "foo", result);
|

2-1-6) Save the file by pressing Ctrl-S.
2-2) Running JUnit Tests
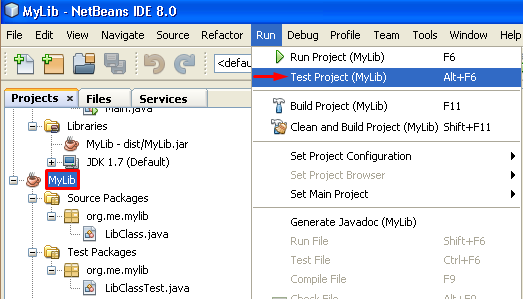
2-2-1) Select the MyLib project node and choose Run > Test Project (MyLib) or press Alt-F6.
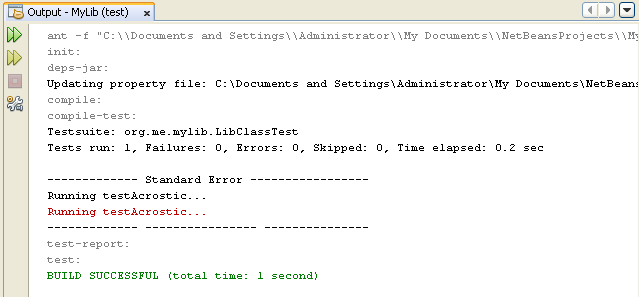
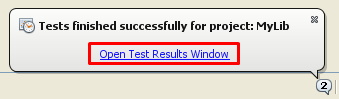
2-2-2) The MyLib (test) tab opens in the Output window. The JUnit test cases are compiled and run. The JUnit test result shows that the test passes.


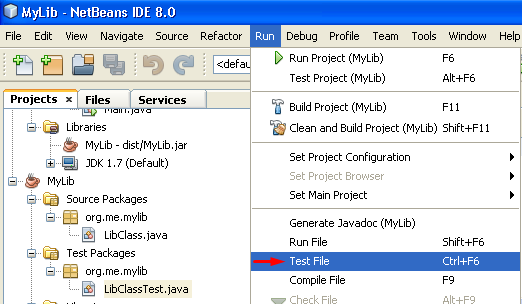
2-2-3) You can also run a single test file rather than testing the entire project. Select the LibClass.java tab in the Source Editor and choose Run > Test File.

The JUnit API documentation is available from the IDE. Choose Help > Javadoc References > JUnit API.
Note: If this is the first time you access Javadoc in the IDE, you need to first choose Help > Javadoc References > More Javadoc. Click Cancel in the Javadoc References dialog box. Then choose Help > Javadoc References > JUnit API.
You can learn more about JUnit by visiting http://www.junit.org
|
3) Debugging the Application
In this section, you will use the debugger to step through the application and watch the values of variables change as the acrostic is assembled.
To run the application in the debugger:
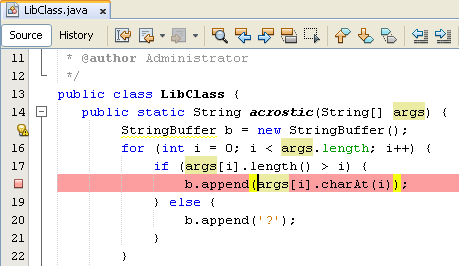
3-1) In the LibClass.java file, go to the acrostic method and place the insertion point anywhere inside b.append(args[i].charAt(i));.

3-2) Then press Ctrl-F8 to set a breakpoint.
3-2) Select the MyApp project node and choose Debug > Debug Project (Ctrl-F5).

3-3) The IDE opens the Debugger windows and runs the project in the debugger until the breakpoint is reached.

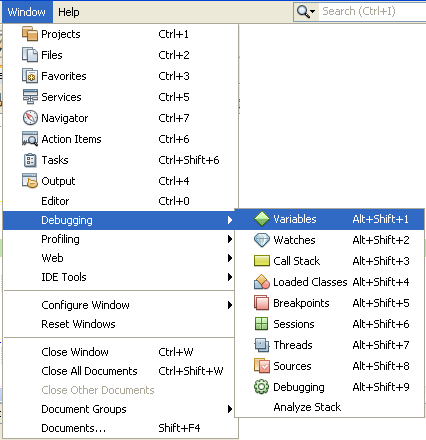
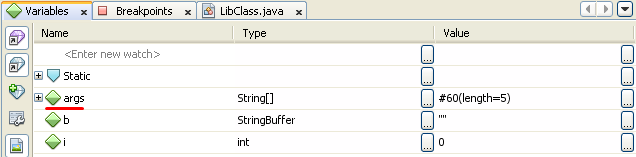
3-3) Select the Local Variables window (available under submenu Debugging).
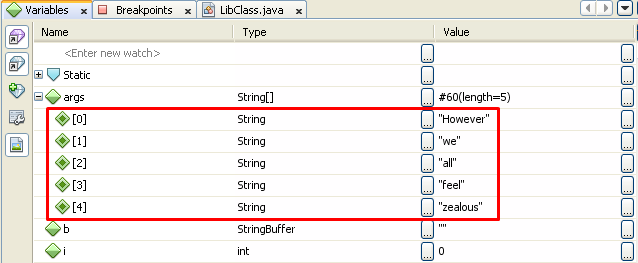
3-4) Expand the args node.
3-5) The array of strings contains the phrase you entered as the command arguments.
3-4) Press F7 (or choose Debug > Step Into) to step through the program.

3-5) Watch the b variable change as the acrostic is constructed.

For more information, see Writing JUnit Tests in NetBeans IDE.
|
DOWNLOAD: Completed Project File
Source: https://netbeans.org/kb/docs/java/javase-intro.html
---
No comments:
Post a Comment