Java Basics 117 – MySQL Databases
STEPS
0) Preparation
0-1) Setting Up MySQL Server.
Download a portable package from http://www.usbwebserver.net/en/download.php
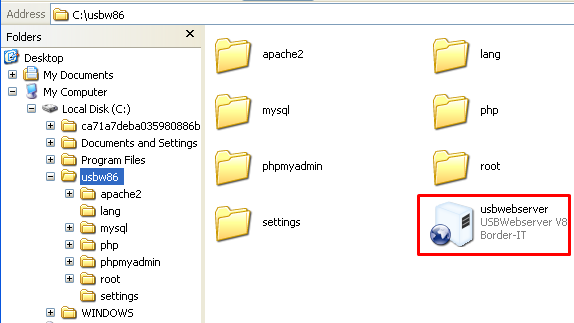
Extract and save to C Drive, eg C:\USBW86
0-2) Run usbwebserver.
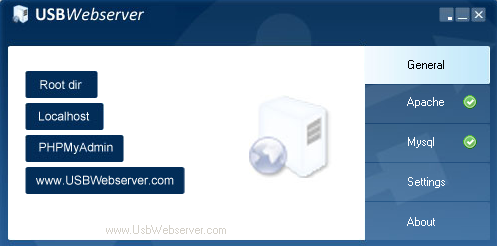
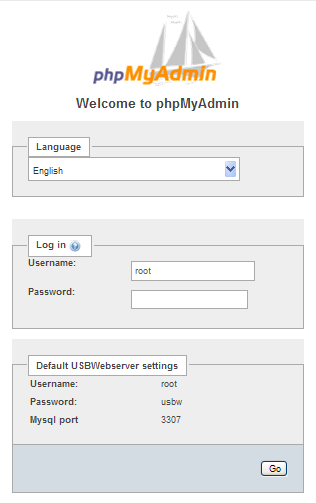
0-3) Click PHPMyAdmin button.
Login using default username/password as root/usbw.
0-4) Run SQL Command
Create Database
CREATE DATABASE IF NOT EXISTS `employees`;
|
Create Table
CREATE TABLE IF NOT EXISTS `workers` (
`ID` int(11) NOT NULL,
`first_name` varchar(20) DEFAULT NULL,
`last_name` varchar(20) DEFAULT NULL,
`job_title` varchar(40) DEFAULT NULL,
PRIMARY KEY (`ID`)
);
|
Create User Grant
GRANT ALL PRIVILEGES ON *.* TO 'adman'@'localhost' IDENTIFIED BY 'adman' WITH GRANT OPTION;
|
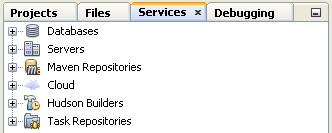
1) Service Panel
1-1) Click on the Services panel.
2) Add New Connection
2-1) Right-Click Databases item, select New Connection…

2-2) Select MYSQL Driver.
Notice the jar file located in NetBeans program folder.
e.g. C:\Program Files\NetBeans 8.0 RC1\ide\modules\ext\ mysql-connector-java-5.1.23-bin.jar

2-3) Prepare the connection properties.
2-3-1) Port: 3307 (This is usbwebserver default port setting)
2-3-2) Database: employees (our tutorial database)
2-3-3) Username and Password: (our tutorial database)
2-3-4) Click Test Connection
2-3-5) JDBC URL is automatically generated by NetBeans.
2-3-6) You must get the “Connection Succeeded” message in order to proceed to the next step.

2-3-7) Click Next, Next and Finish.
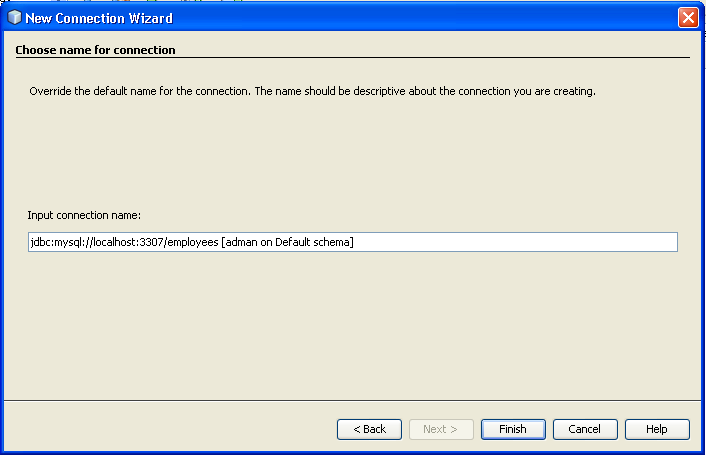
2-3-8) Your connection name (in Step 2-3-7) should appear in Service list.

3) Connecting to the Database.
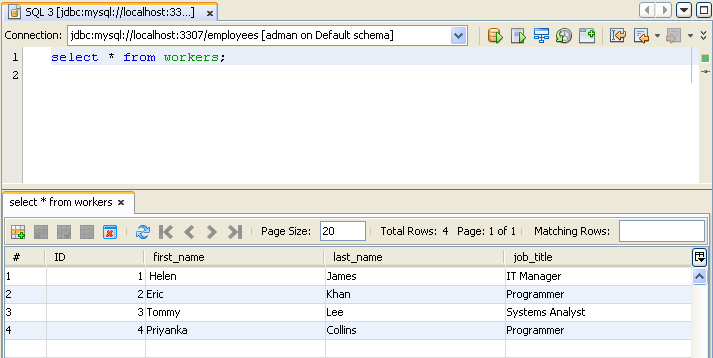
3-1) Right-Click the Workers table, select View Data.

3-2) Viewing Data.
At the moment, there is no record.

4) Add Records
4-1) Enter a new record.
Click the New Record button.
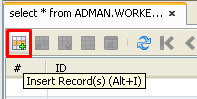
4-2) Insert Record Window pops up.
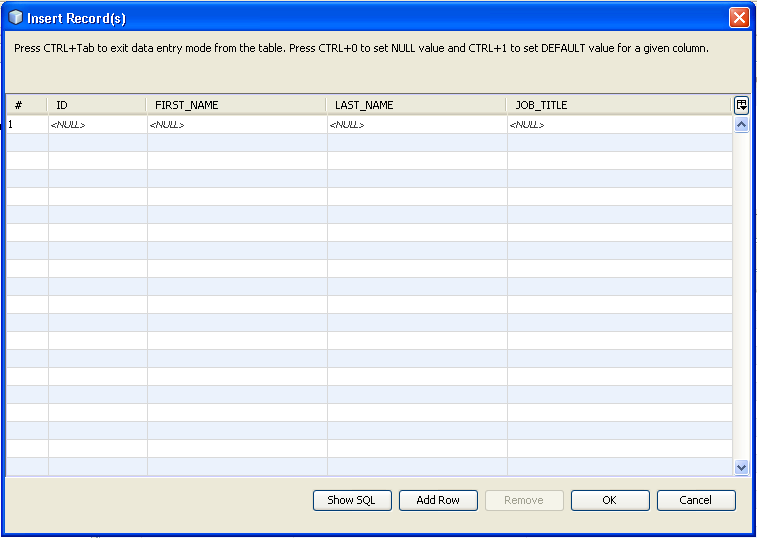
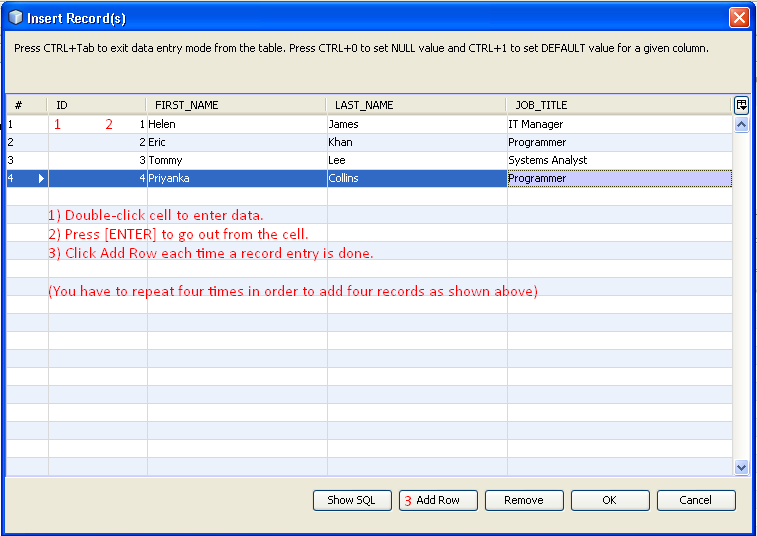
4-3) Enter the new record.
4-3-1) Double click to get into the cell.
4-3-2) Press [ENTER] to go out from the cell.
4-3-3) Click Add Row button when a single record entry is done.
ID: 1First Name: HelenLast Name: JamesJob Title: IT Manager
ID: 2First Name: EricLast Name: KhanJob Title: Programmer
ID: 3First Name: TommyLast Name: LeeJob Title: Systems Analyst
ID: 4First Name: PriyankaLast Name: CollinsJob Title: Programmer
4-4) Outcome.
4-5) If you check using PHPMyAdmin, your data should exist.
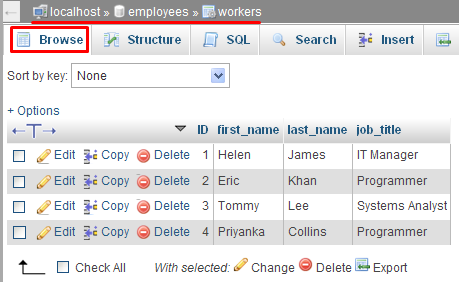
(The sql dump for the records)
INSERT INTO `workers` (`ID`, `first_name`, `last_name`, `job_title`) VALUES
(1, ' Helen', 'James', 'IT Manager'),
(2, 'Eric', 'Khan', 'Programmer'),
(3, 'Tommy', 'Lee', 'Systems Analyst'),
(4, 'Priyanka', 'Collins', 'Programmer');
|
5) Running Java Program To Connect To MySQL Server.
5-1) Refer the previous tutorial. Trying changing the connection name to the above MySQL connection,
Eg jdbc:mysql://localhost:3307/Employees

5-2) Run.

5-3) Add MySQL JAR file to your project library.
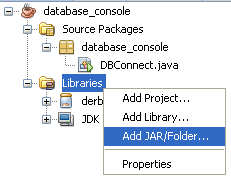
5-4) Point to the location noted in Step 2-2.
Eg C:\Program Files\NetBeans 8.0 RC1\ide\modules\ext\ mysql-connector-java-5.1.23-bin.jar
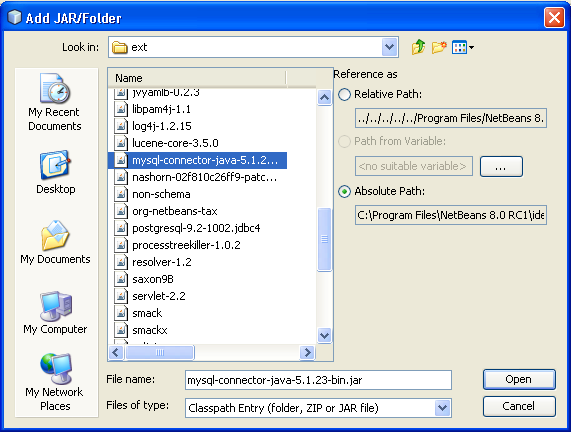
5-5) JAR is added to library.

5-6) Run.

Hello,
ReplyDeleteYou are a Great while writing in the blogs it is awesome I liked. it too much good and informative thanks for the sharing.
Buy Etizest